Intro
I’m going to walk you through creating your first blog with Gatsby. I’ll cover setup, features, and deployment steps.
Technology Bits
- Gatsby v3
- Azure Static Apps
- MacOS
- VS Code
Setup
Okay, first things fist, you need to setup your local environment!
If you don’t have npm installed do that here.
After you have npm installed run
npm install -g gatsby-cliLike all good things, simple is better. So let’s start with the official Gatsby Starter Blog package.
gatsby new my-gatsby-project https://github.com/gatsbyjs/gatsby-starter-blogAfter that finishes run
cd my-gatsby-project
code .
gatsby develop
Then you should be able to visit your site on http://localhost:8000/
Open gatsby-config.js and edit the basic info at the top.
- title
- author
Open src/components/bio.js Change “You should follow them on Twitter” to “Follow me on Twitter”
Grab a picture of yourself or logo and add to src/images. Change the bio-avatar src to your new image.
Next up head to src/components/layout.js and remove or replace Built with Gatsby.
Write a blog post
Head to the content/blog folder. Here you will see examples of markdown files and image references. Create something unique to you that you’d like to post.
If you are still seeing images or text from the template you can clear your browser cache and it will go away. I clear cache by hitting f12, then right click the refresh icon to see the empty cache and hard reload option.
Add to GitHub
- Create a new repo for your blog site.
-
Save changes made to blog
git add .
git commit -m "first commit"
git branch -M main
git remote add origin https://your-github-rep-url
git push -u origin main
Deploy to Azure
- Sign in to the Azure portal
- In the top bar, search for
Static Web Apps - Select Static Web Apps
- Click
Addat the top left - Fill in info required
- Sign in to GitHub
- Select your blog repo from the dropdown options
- Select
Gatsbyfor the Build Presets option - Leave other options below Build Presets as default options
- Click “Review And Create”
After you’ve completed this, the deployment for the hosting location should complete quickly. Then click “Go to resource”
Here you can see metrics and configure settings and your custom domain.
Now head to see your build already started in github actions! You can click a direct link at the top of your azure resource GitHub Action runs.
After your GitHub action completes, head back to your Azure Resource and open the URL for your blog shown on the top right.

Custom Domain
Have a custom domain already? Awesome! If not head to https://www.namecheap.com/ and grab one you like!
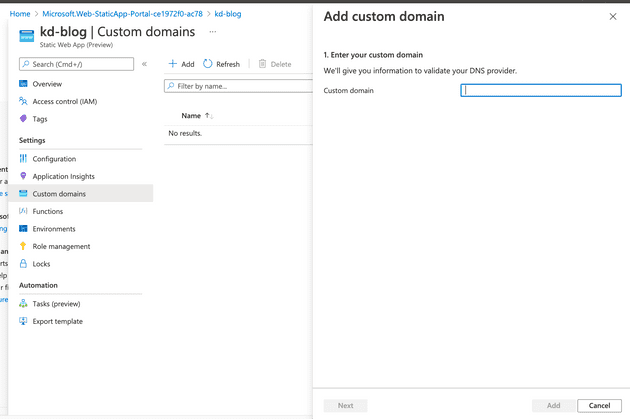
In your Azure Resource, open the custom domain menu type your custom domain like www.kurtdowswell.com

Then go back to namecheap or wherever you have your domain name registered. Edit your DNS settings and add/modify your www CNAME with the values listed on the validate screen.
After DNS changes are made, validate your domain in azure, then click add. NOTE, if you have issues it could take up to 48 hours to propagate your DNS changes. Mine normally are almost instantly complete but it can vary greatly.